HDR Photography

As a photographer, I always try to capture a scene in its most raw or original form. I can achieve this using manual mode in my camera, by adjusting Exposure, white balance, aperture, and shutter speed. However, in modern-day photography, HDR offers a means to create a more striking image than the human eye can perceive.
In this article, we will walk into the world of the HDR effect, exploring what it is, and how it is achieved using both a camera and a mobile phone.
What is HDR Photography?
HDR photography is a technique using which you can capture a wider range of tones and details in your photographs. Traditional photography often struggles to capture this wide range accurately. When you try to expose the bright areas, the dark ones become too dim, and vice versa. This limitation led to the development of HDR photography. The term HDR stands for High Dynamic Range. It is the difference between the brightest and the darkest part of a photo.
While HDR photography used to be only a professional photographer’s cup of tea, in recent times, with the rise of smartphones and smart cameras, HDR capabilities have been built into these new-age devices.
HDR Photography With A Camera:

Most cameras these days have a built-in HDR mode that will automatically take multiple shots and combine them for you. However, if your camera does not have an HDR feature, you have to take multiple photos of the same scene at different exposure levels and then combine them during post-processing.
Here are the steps to take an HDR photo with a camera:
- Set your camera to Aperture Priority (Av) or Manual mode (M).
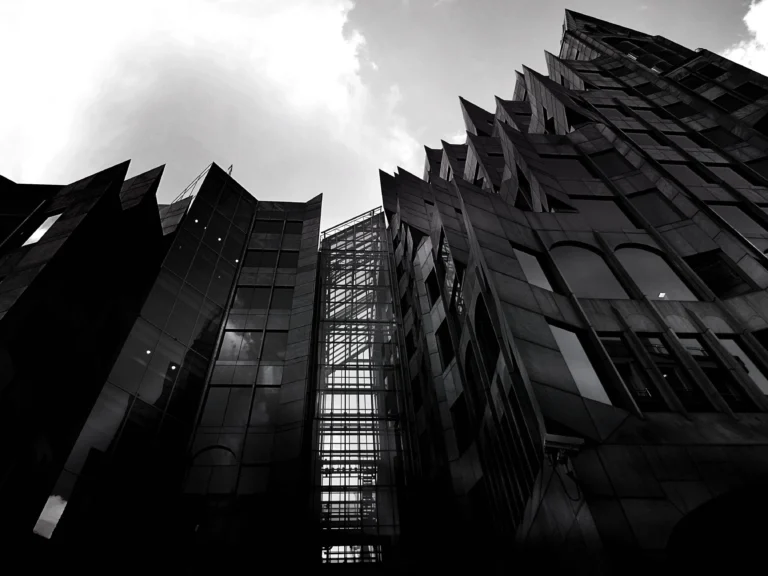
- Find a scene with multiple variations, like the sky with dense white clouds and the scenery contrasting the sky.
- First, click the photo with normal exposure.
- Next, click another photo with a slightly lower exposure to capture highlights.
- Next, take a third photo with a higher exposure to capture shadows.
- Use software, like Adobe Photoshop, to join the pictures into an HDR photograph.
HDR photo editing: Adobe Photoshop Post Processing
Follow the below steps in Adobe Photoshop to join photos:
- Open Adobe Photoshop >File > Automate > Merge to HDR Pro.
- In the Merge to HDR Pro window, click the “Browse” button to select the photos you want to merge.
- After selecting the photos, click “OK”. Photoshop will analyze the photos and create an HDR image.
- In the HDR Pro window, you can adjust the settings to fine-tune the effect. You can adjust the exposure, gamma, and other parameters to create the desired HDR effect.
- Once you are happy with the settings, click “OK” to create the HDR image.
The HDR image will be created as a new Photoshop document. You can save it as a separate file or continue working on it in Photoshop to further enhance the effect.
HDR Photography With A Cell Phone:

Most mobile phones these days have built-in HDR mode in their cameras. Thus making it easy to take HDR photographs. Here are the steps to take an HDR photograph with a mobile phone:
- Open your phone’s camera application and click on HDR mode.
- Find a scene with multiple variations, like the sky with dense white clouds and the scenery contrasting the sky.
- Hold your phone steady and tap the shutter button to take the photo.
- Your phone will automatically take several photos at different exposures and combine them into one HDR photo.
Related Article : Digital Photography : A Beginner’s Guide


Tips For HDR Photography:
- Use a tripod or steady surface to keep your camera or phone steady.
- Avoid moving subjects, as they can cause ghosting in the final image.
- Experiment with different exposures to get the best results.
- Use post-processing software to fine-tune the final image.
HDR photography is a powerful technique. If learned correctly, it can deliver shocking and highly detailed images. Just take multiple photos at various levels of exposure, then combine these images using photo editing tools. Using this technique, you can capture the full range of tones and details of any scenery and, for sure, get stunning results.
Hope this article was helpful. Would love to know your thoughts, please comment
Follow Me on Instagram, Facebook & Pinterest.
Disclaimer: The photos used in this article are taken from free stock photo websites. We do not intend to copyright anyone’s work. These images are used for educational purposes only. All rights to these photos belong to the original owners. Contact us if you wish to get these photos removed.
HDR Photography learn, hdr photography tutorial, hdr photography explained, hdr photography tips, hdr photography examples, what does hdr photography mean, how to learn photography and videography, how to learn photography and editing, learn photography Bangalore,how to learn photography step by step, learn photography Hyderabad,learn photography and editing, how to learn photography for free, how to learn photography for beginners,hlg photography,learn photography in delhi,hdr light studio tutorial,how to learn photography online free,how can i learn photography on my own,learn photography online,photography learning near me,how do i learn photography,learn photography and videography,how to learn photo and video editing